Thursday, May 6, 2010

grilled gruyere with caramelized onions and dijon


alright...let's be realistic here; this is just a fancy grilled cheese sammich.

upon my first visit to extraordinary desserts on union and ash in SD, i tried this for lunch ('course, it was served as a sexy panini, plated with sophistication and loooove), and thought it was extremely flavorful. it was always on the backburner to try it out, but just never got around to it, 'til now.

It was a great learning experience, as I've never caramelized onions before. The gruyere is a little pricey, but it's great for melting and was a nice change from my usual hard cheese fetish.

Anyway...so here we go. Besides the lengthy process of caramelizing onions, it was fairly easy.


::gathering my raw materials::

Ingredients


2 slices of whole wheat bread (or whatever bread you like--sourdough, rye, white, etc)

4 oz sliced Gruyere

1/2 onion sliced vertically (don't dice)

1-2 tbsp dijon mustard

2-4 tbsp olive oil

1 tbsp butter


Directions

On medium heat, add your butter and olive oil to a medium sized frying pan. Once hot, add your onion slices. Make sure there's enough oil to coat the slices, and drop the heat down to low/medium.


About 10 minutes into their simmer stage, add a dash of salt. Some people add sugar as a part of the caramelization process. My sister told me about a tip she learned on America's Test Kitchen--add a little water, lid the pan, and let them slow cook. I didn't lid mine, nor add water--this may be why they came out a little...er...crispier than I would have liked. = )

OK so while they're cooking, you can do other stuff. I used this time to slice my Gruyere.


Slice it thin enough where it'll melt easily. Doesn't have to be perfect. If you have one of those rad cheese slicers, have at it. But again, since it's going to melt, just try to get it as thin as possible.


So turning back to your onions, just move them around a little, but wait for them to do their thang...


and wait


and wait...


alright...so again, next time i'm gonna cover them, add more liquid, and let them get...stickier. but hey, i didn't burn them, so i was pretty stoked for that...

take your onions away from heat, and put them aside. get your bread and slather on some dijon mustard on both sides.


Plop your onions on one side, and your sliced gruyere on the other. or layer some gruyere on both sides, and onions on one side.


Close the sandwich, and spray a medium skillet with cooking spray. Bring up to medium heat.


Using a spatula, gently press the top of the sandwich, and allow the bottom to brown. Flip the sandwich and repeat this process until the cheese is melted.


Once nice and melted, remove from the pan and transfer to a plate. Enjoy with pickles, chips, a salad, or alone.


The patience is in the onions caramelizing. Otherwise, it's fairly quick. Gruyere is a bit steep in price, but it melts nicely and compliments the onions. I was glad to have tried it. Next step...buy a panini press = )

Wednesday, May 5, 2010

tri veggie-cheese omelette


Back to breakfast... = )

Alright, this is another easy dish that can be jazzed up to your liking. Breakfast is always fun to make. Plus, everything tastes great when you're hungry.

So what to do with a slew of eggs and veggies? Make an omelette of course! I'm not a huge breakfast person--my breakfast usually consists of coffee, toast, and maybe yogurt or cottage cheese. But hey, once in a while it's fun to bust out a pan in the morning and do something with eggs.

I confess...I'm not big on vegetarian dishes. I grew up eating meat. I love meat. I try to incorporate meat into most of my dishes. However, I get easily distracted with cheese, so this is one of the few dishes I don't mind eating that's meatless. It's not hard to make; just a little more time consuming with veggie cutting, cheese shredding, etc.

::gathering my raw materials::


Ingredients


1 cup diced onion, tomato, and green peppers (or really, whatever other veggies you prefer.)

2 large eggs

splash of milk

1/2 to 3/4 cup shredded cheese (I used crumbled feta, aged cheddar, and mozzarella)

Seasonings - cumin, chili powder, pepper, salt - all to taste. No boundaries-whatever you like.

Cooking oil (for your pans)


On with it...

Directions:

Chop your veggies and heat a small frying pan with a bit of cooking oil. Keep your heat low, so you can go off and do other stuff while they're cooking.


Note: I generally saute my veggies before I add them to the omelette so they 1) have great flavor all together and 2) i hate raw veggies with cooked egg. If you don't mind raw veggies, you can skip the cooking part. But if you dom at this point, you can add whatever flavorings--I added a bit of cumin and chili powder, just for a nice additional flavoring to coat the veggies while cooking.


While your veggies are simmering, prep your cheese off to the side on a plate. I save about 1/3 of what I use for the top of the omelette...and I don't hold back with cheese. Feta cheese in egg is so yummy, and definitely a throwback to my childhood. You also don't really need too much additional salt when you cook with feta, especially with egg.


Remove your veggies from the heat, and start your egg. Sometimes I'll just do an egg white omelette, which is yummy too--but I don't eat eggs that often, so I went all the way. Two large eggs, add a little bit of milk, and pepper. Whisk with a fork.


Heat a medium frying pan with a little bit of cooking oil and pour your egg mixture onto it. While it's bubbling, add your cheese. Then add your cooked veggies.


When the egg is cooked enough on the bottom, carefully fold the omelette in half with your spatula. Let it come together for a few seconds, and then carefully slide onto a plate. Sprinkle the remainder of your cheese on top while hot.


Have with toast, potatos, salsa, tortillas, or eat alone. Enjoy = )

Sunday, May 2, 2010

mapley walnut cookies


Having a rough day? Bake something. 'nuff said.

Cookies are my quick, easy way to escape my troubles and woes. I've been making cookies forever and ever, so I like to utilize my no brainer 'base dough' (in which I heavily modify, depending on what kind of cookie I want to make).

Oh baking, the 'exact science.' ::rolls eyes, clicks tongue, sighs:: Whatever. Honestly, it's trial and error. I learned by "ish"ing my way through recipes--and seriously, there's a billion recipes out there, and they're all different. So really, when it comes to recipes, I bend a lot of rules. I generally browse a couple of similar recipes, use good judgement, and play with them to make my own. If X doesn't work this time, try Y next time. Eventually, you'll get into a "routine" of what works for you...and then you can contribute to the sea of recipes on google. But I digress.

So on with it. Mapley walnut cookies rolled in cinnamon and sugar.

::gathering my raw materials::

Ingredients
1 stick butter, softened (if using salted, skip salt addition below)

1 cup white and brown sugar mixed together (however you wanna split this, is entirely up to you. I prefer more brown sugar for flavor and chewiness)

1 egg

1/2 tsp maple flavoring

1 tsp baking soda

1 tsp baking powder

1/4 tsp salt (if not utilizing salted butter)

1 1/2 to 2 cups flour

1/2 cup chopped walnuts

1/4 cup cinnamon sugar for rolling


Directions

Preheat oven to 350 F. In a mixing bowl, beat together your butter and sugars until fluffy. Add your egg and maple flavoring, and continue to beat.


Set aside for now, and chop your nuts if you haven't already. Mini choppers or hand mixers (with the chopper attachment) work wonders for nuts, and make a great addition to your kitchen gadgets. Sure beats lugging out the food processor.


Add your baking soda, baking powder, and salt to the wet mixture and mix. I do this first to ensure that all the main levening ingredients get into the mix, as you may not use all 2 cups of your flour. Begin to add your flour a little at a time to the mixture, and continue to mix. You want the dough to be soft, but not super sticky. If you're after a chewy cookie, too much flour will prevent this from happening, so touch your dough at the 1.5 cup flour mark.


Finally, mix in your chopped walnuts with a wooden spoon, and make sure they're well incorporated into the batter.


Once you feel comfortable enough with the dough, begin rolling into little 1" balls. Pour some cinnamon sugar in a small bowl and coat the dough balls before placing on a cookie sheet. Give enough space for the cookies to expand/flatten during the baking process.


Bake for 12 minutes, or until golden brown and remove from heat. Enjoy when cooled, or slightly warm.

So there you have it...very easy, quick cookies. The maple flavoring is a nice addition to the cookies, and you can't go wrong with walnuts. You can use the "core" cookie dough recipe over and over for different recipes (everything listed above, besides the maple flavoring and walnuts).

Baklava


Alright...so after 20 some years of watching my ma do this every Christmas (and of course, waiting anxiously for the finished results, after the torturesome buttery aromas wafting around the house), I decided to take a stab at it. Baklava can be modified in tons of ways, but I decided to keep it simple with the ingredients and taste. The next time I try this recipe, I'll definitely buy my phyllo dough in lieu of rolling it out. THEN it'll be perfect. I can't complain though, for my first attempt. So anyway...here's my little baking journey through baklava.

::gathering my raw materials::


Ingredients:

Phyllo (you can totally skip this and buy phyllo dough @ any grocery store--try international markets for the best prices)

2-2/3 cup sifted all-purpose flour
1 teaspoon salt
1/2 cup lukewarm water
2 tablespoon salad oil

Filling:

8 oz shortbread cookies
4 oz walnuts
1 tbsp cinnamon
1/4 tsp cloves
1/4 tsp allspice
1/2 cup butter, melted


Syrup:
1/2 cup honey
1/2 cup syrup
1/2 tsp ground cloves
1/2 tsp cinnamon
1 tbsp lemon juice
1/3 cup water


Directions for phyllo dough:

Sift flour and salt into a bowl. Gradually add water, stirring to make a stiff dough. Turn onto a pastry board. Place the oil in a bowl and spread a little of it on the palms of your hands. Knead the dough with a folding and turning motion, adding more oil to your hands when dough begins to stick.


Continue until you have a smooth, elastic ball of dough and the oil is nearly all used. Then roll the ball of dough in the remaining oil to cover all sides, place a clean cloth over the bowl, and allow the dough to rest for a half hour or more in a warm place away from drafts.


Directions for filling:

While you're waiting on the dough, start on your filling. In a food processor, throw in your cookies, walnuts, cinnamon, ground cloves, and allspice. Set aside.


::back to the dough::
Separate 1/4 of the dough and roll to 1/4 inch thickness on a flat surface with cornstarch to prevent sticking. Put your hands under the dough, palms down and gently stretch and pull the dough with the backs of your hands, working your way around the table, until the dough is as thin as tissue paper. Do not worry if it hangs down around the edged of the table, or if some holes appear, especially around the edges. Cut off the thicker edge and save the scraps.


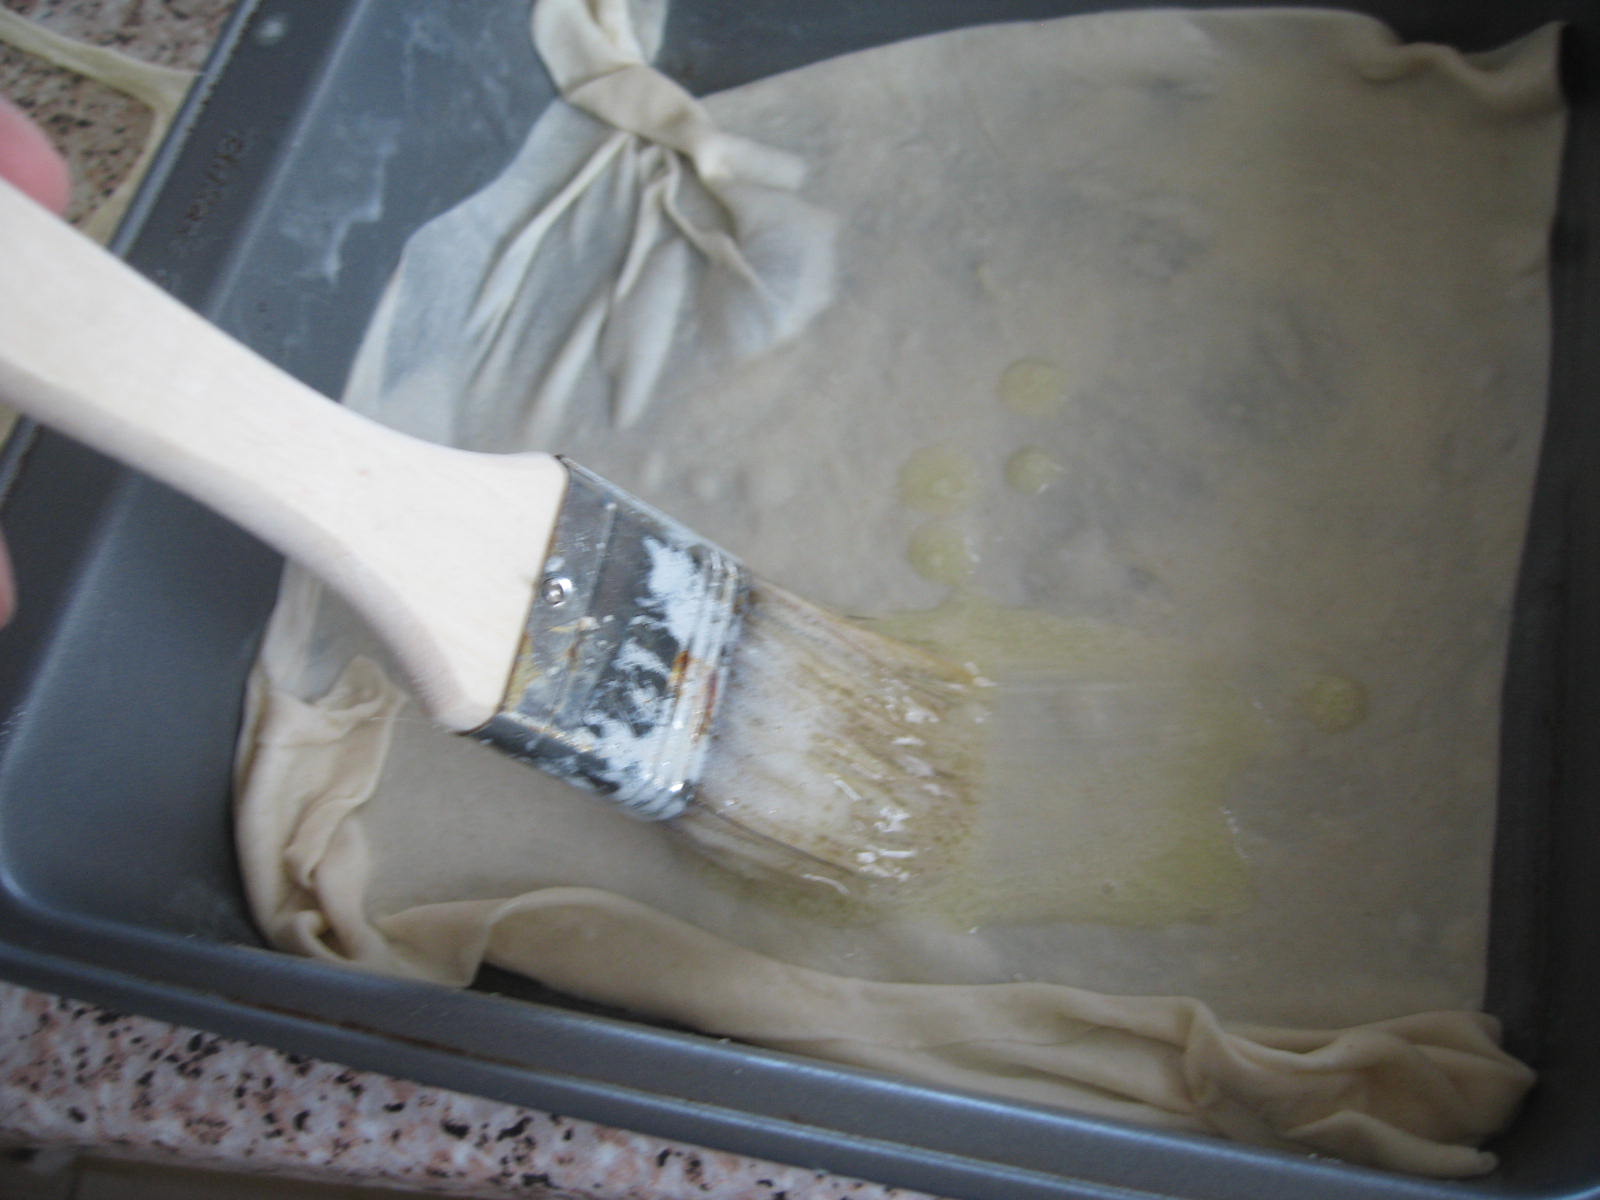
Walk away for 10-15 minutes to let your phyllo dry. This is a step I fudged, and ended up with delicate dough that stuck together in the corners. I used the scraps to fill in the gaps. Anyway, as carefully as you can, cut into about 4 squares (I used an 8x8 square pan). With a pastry brush, brush on some of your melted butter onto the bottom of the pan.

Put a layer of phyllo (carefully) into the bottom and generously brush with butter. Sprinkle your filling on top, and cover with another layer of phyllo dough.


Repeat this layering process until all your layers of phyllo have been utilized. Cut squares or triangles into the pan before you bake, and brush the last of your butter on top. Pop in the oven @ 350 F for about 20-25 minutes or until golden brown.


Cooking the syrup
Good idea to start this while you're waiting for your baklava to bake. In a saucepan (on low to medium heat), combine all the ingredients and heat until the syrup mixture slightly bubbles. Turn off your burner.


Remove your baklava from the oven. Allow to cool for an hour, and then carefully pour your syrup mixture over it. It's important to allow to let the baklava cool before you add your syrup, so your phyllo remains crunchy even after the syrup is added.


Allow to set for another 30 minutes or so, then cut and enjoy! I like to put in little cupcake cups for individual servings.


Note: again, baklava is one of those desserts where there's so many different modifications you can make with nuts, fruits, syrups, and baking methods. Some people like to roll it into logs and cut, and others cut into triangles. Either way, it's definitely fun. For the syrup, less is definitely more to maintain the crunch.