Remember, remember, the month of December...
it's when i drag out my rolling pin, motivation, and patience to make these little guys. Four and a half hours of hunching over 80 something little cookies, tweezers, sanity, and something good to watch on tv. thankfully, history channel had a marathon going on, so i was set.
::gathering my raw materials::
(note: this recipe is courtesy of paula deen's sugar cookie recipe).
the dough--done the night before, because i needed every ounce of energy for the next day...
1 cup butter, softened
1 cup sugar
2 large eggs
2 teaspoons vanilla extract
3 1/4 cups all-purpose flour
2 teaspoons baking powder
1/2 teaspoon salt
Edible Paint Icing (aka royal icing)
Garnish: silver dragees, sugar pearls, sparkling sugar


Directions:
(the dough)
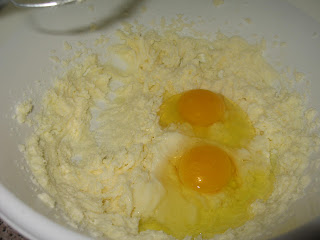
In a large bowl, beat butter and sugar at medium speed with an electric mixer until fluffy. Beat in eggs, vanilla and almond extract until combined.
In a medium bowl, combine flour, baking powder and salt. Gradually add to sugar mixture, beating until smooth. Wrap dough in heavy-duty plastic wrap, and refrigerate 1 hour...or a day, like I did.


::the next day::
Preheat oven to 350 degrees F. Line 2 baking sheets with parchment paper.
On a lightly floured surface, roll out dough to 1/4-inch thickness. Cut with assorted snowflake cookie cutters and place 2 inches apart on prepared baking sheets. Bake for 15 minutes, or until edges are very lightly browned. Let cool for 2 minutes on baking sheet. Remove from pans and cool completely on wire racks.


::the icings::
First one - Royal
3 tablespoons meringue powder
2 cups confectioners' sugar
Food coloring, optional
In a medium bowl, combine water and meringue powder; whisk until foamy. Whisk in confectioners' sugar until smooth. Add food coloring, if desired. Use immediately.


I portioned some white icing out into a piping bag with a writing tip for the snowflake pattern. For the rest, I added water to make it runny, and easier to spread to paint on the cookie. Paint each cookie with a pastry brush.

While the icing is still sticky, garnish with colored sugar crystals as desired.


Second- chocolate
If you want to do chocolate coated cookies, set up a double boiler, and do the same steps...but with yummy melted chocolate. = ) The chocolate will harden in place, but you want to work quickly, before it thickens and hard to paint.


Pipe your royal icing onto the cookie in whatever snowflake design you'd like. It's easy to go from corner to corner of the cookie, and do a little "V" at the end. While the icing is still soft, place various colored dragees or edible pearls as desired.

And there you have it. Festive snowflake cookies. You can get as detailed, or keep it simple. Either way, they make a nice gift, and keep the holiday spirit going.


