Wednesday, May 26, 2010

a comfort classic...meatloaf...


...with mashed potatos, gravy, and veggies. = )

yesterday, i was (nerdily) stoked when i signed up for membership to America's Test Kitchen (ATK). In general, they provide recipes based on their own trial and error experiments with flavors, textures, you name it. I had a lb of ground beef to use, and didn't really feel like making some sorta meat sauce with pasta--since that's the usual no brainer dinner when I have ground beef.

The thought of meatloaf makes me laugh because it's such a "kid" dish. It's that dish that mom, grandma, or auntie makes for you, but you never really think of making on your own. Especially, since most meatloaves have that ketchup coating! How can you take a dish seriously, when you slather ketchup on top?

So yea. With the assistance of ATK's meatloaf recipe (adapted and modified, of course), my meatloaf came out very moist and flavorful. Along with some veggies and potatos, it was fun to make...basically, a fancified TV dinner. = )


::gathering my raw materials::


Ingredients:

~ The meatloaf ~


1 lb lean ground beef
1 egg
1/2 tsp unflavored gelatin
1/4 cup chicken broth
1 tsp soy sauce
1 tsp dijon mustard
1 tsp dried thyme
1/3 cup tomato juice
1/4 cup crackers, crushed
1 small clove garlic, minced
1/4 cup onions and peppers diced
dash of paprika
2 oz (finely) shredded cheese
dash of salt and pepper
1 tbsp cooking oil


~the glaze~

1/3 cup ketchup
1 tsp hot sauce
1/3 tsp ground coriander
1/4 cup cider vinegar (i used white, i don't think it matters much)


~mashed potatos~

3 medium potatos (i used small red potatos for 2 servings)
1 cup milk
1/4 cup unsalted butter
salt, pepper, and other seasonings of your choice, to taste
1/2 tsp minced garlic

~gravy~

1/2 cup browned flour
1 cup water (or more, depending on thickness)
1 tsp beef or chicken bouillon (to taste)
any other seasonings of your choice.


Directions

~ Meatloaf~

Heat oil in small skillet over medium-high heat. add onions, peppers, and garlic, stirring occasionally, until beginning to brown, 6 to 8 minutes. Reduce heat to low and add tomato juice and dried thyme. Cook, stirring to scrape up browned bits from pan, until thickened, about 1 minute. Transfer mixture to small bowl and set aside to cool.


Whisk broth and eggs in large bowl until combined. Sprinkle gelatin over liquid and let stand 5 minutes. Stir in soy sauce, mustard, crackers, parsley, salt, pepper, and onion mixture.


Sprinkle shredded cheese over mixture. Add ground beef; mix gently with hands until thoroughly combined, about 1 minute.


Transfer meat to a baking pan. Bake for about 35-40 minutes @ 375F.


While meatloaf cooks, combine ingredients for glaze in small saucepan; bring to simmer over medium heat and cook, stirring, until thick and syrupy, about 5 minutes.


After meatloaf cooks, remove from oven and turn on the broiler. Spread half of glaze evenly over cooked meatloaf with rubber spatula; place under broiler and cook until glaze bubbles and begins to brown at edges, about 5 minutes.


Remove meatloaf from oven and spread evenly with remaining glaze; place back under broiler and cook until glaze is again bubbling and beginning to brown, about 5 minutes more. Let meatloaf cool about 20 minutes before slicing.

~the potatos~

So while you're twiddling your thumbs waiting for the meat to cook, make some side dishes = )

Gawd, this is a no brainer, really...i've been making mashed potatos since i was little, so i assure you, it's just a process of mashing and tasting. Grab your potatos and cut them into thirds, halves, fourths, whatever you would like.
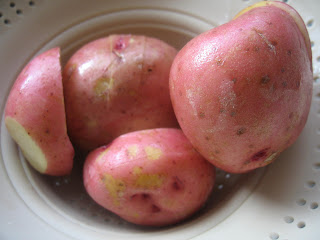

Now, some people prefer to boil, but I like to nuke mine in the microwave. Throw them in a grocery bag, and cook for 8-10 minutes, for a small to medium batch. The great thing about red potatos? You don't have to peel, haha. Otherwise, peel your brown potatos, and then nuke 'em.
Remove from heat and put in a medium bowl. Add your butter, salt, pepper, garlic, and milk. If your butter is cold, throw that in first. Now just mash away with a potato masher.


I added dried rosemary and lots of garlic and pepper--but i highly encourage you get creative, and let your taste buds be your guide.


~the gravy~

Gravy can be easy or hard--depending on a lot of factors. For instance, I had a momentary brain fart and forgot to remove my flour from heat before adding liquid. Yipes. Anyway...

Put your flour in a small/medium pan and on medium heat, brown it. DON'T DO WHAT I DID: PLEASE, PLEASE, PLEASE TURN DOWN THE HEAT, OR REMOVE PAN FROM HEAT!


Otherwise, once you add your water, you will end up with a bubbly mess--and lots of lumps. = ( Not sure what I was thinking, but of course, I had the epiphany in the first round of water. ::sigh:: luckily, once the heat subsided, I was able to finish. Added the bouillon and a dash of garlic powder. Stirred, stirred, stirred. Tempted to bust out with the immersion blender, but it was fine--just for me, anyway.


Lastly, veggies. Yes, important to eat the veggies. I keep frozen veggies stashed for easy access/meals. Or for those who keep up with fresh produce, chop, peel, cook. Throw a cup of mixed veggies in the microwave (or in a saucepan to boil) and cook. Remove from heat.

Serve up your meatloaf with potatos, gravy, and veggies. There you go. You have now transitioned into adulthood by making this dish. Enjoy = )

Monday, May 24, 2010

Easy crunchy, mapley, walnuty granola


Mmmm...granola. I dig it alone. I like it with milk. It's awesome with yogurt.

This afternoon, I wanted yogurt with some fruit and something crunchy. I sliced a large strawberry, and grabbed a box of kashi. To my disappointment, the cereal lumped together, (I had to thunk it on the counter a few times to separate some clusters), and just didn't have a nice crunch anymore. I ate it, but my granola craving lingered on.

I remembered that the newest Bon Appetit magazine had a granola recipe. So heck, why not? I had all the ingredients, so I was off and running.

The assembly process is fairly simple. If there's anything tricky at all, it would be the baking part, or even the decision as to what flavor/additions to add. For the purpose of getting this down, I'm putting in the ingredients that I used. If you like almonds, peanuts, or cashews--add those! Just DO note that if you add fruit, make sure these come at the end to prevent drying out or burning. Anyway...here we go.

::gathering my raw materials::

Ingredients:

note: this is NOT the identical recipe to the bon appetit; I modified it to my taste/portion amount that I wanted. You can find the actual recipe here.

2 cups quick rolled oats
1 tsp salt
1 tbsp cinnamon powder (more or less, but I love cinnamon powder so I heap it)
2 tbsp vegetable oil (I did 1 tbsp EVOO, and 1 tbsp veg oil)
1/4 cup honey
2 heaping tbsp brown sugar.
1/4 tsp maple flavoring
4 oz chopped walnuts


Directions:


Mix your rolled oats, salt, walnuts, and cinnamon in a medium bowl. Set aside.


In a small saucepan, add your oils, honey, and brown sugar. Remove from heat once the brown sugar is melted. Pour the liquid into the bowl with the dry ingredients, and begin mixing with a spoon.


If you like clumpy granola (which I do), get in there with your hand and squeeze the granola to form clumps.


Once everything is nice and incorporated, spoon the granola into a baking pan/sheet. Pop into the oven @ 325F. After 8-10 minutes, remove from heat and stir. Place back in the oven and repeat this process about 2-3 times.


You definitely don't want to walk away for too long during this step. I speak from fail granola experience. =)

Finally, after about 20-25 minutes have passed, turn off your oven and remove the pan. If using dried fruit, add now--any sooner, and it will dry out even more, or burn. Allow to cool, and enjoy. Store the rest in an airtight container. Enjoy alone, with milk, yogurt, or fruit. = )

Friday, May 21, 2010

Lemon Cupcakes


...topped with a lemony cream cheese frosting. w00t.

i love birthdays. it gives me a chance to get creative with a gift i'm giving a friend or loved one. i especially love giving gifts to people who enjoy desserts. gives me a chance (and excuse) to get creative from production to presentation.

this year, i decided to bake some cupcakes for my good friend. once again, taking advantage of my coveted texas-size muffin tin, I filled 'em, baked 'em, and decorated 'em. Jumbo cupcakes are the best, because it's like you're getting 4-6 mini cakes. So here we go.


::gathering my raw materials::


Ingredients:

~Cupcake batter~

1/2 cup sugar

2 large eggs

1/2 cup butter

1/3 cup sourcream

1/4 cup milk

4 tbsp lemon juice

1 tbsp lemon zest

1/4 tsp lemon extract

1.5 tsp baking powder

1 cup flour, sifted

dash of salt

A few drops of yellow food coloring

~Ingredients for Frosting~

8 oz cream cheese, softened

8 oz shortening or butter

1 box confectioner's (powdered) sugar

2 tbsp lemon juice

1 tsp lemon zest

1/4 tsp lemon extract

A few drops of food coloring (depends on how yellow you want; add more)


Directions:

For cupcakes

In a medium bowl, sift flour, salt, and baking soda. Set aside.


Zest your lemon, then squeeze the juice (using a sieve to catch pulp and seeds) into a small bowl. Set aside.


In a large bowl, cream butter and sugar until light and fluffy. Beat in both eggs. Add lemon zest, juice, extract, and food coloring.


Whisk your milk and sour cream together and set aside in a separate container.


Beat in about 1/4 of the flour mixture into the largest bowl. Beat in some of the sour cream mixture into the largest bowl. Continue to alternate between the flour and the sour cream mixture until both are used.


Scrape down with a rubber spatula. Line your jumbo muffin tins, and spoon the batter into all six spaces.


Bake for 20-25 minutes at 350F, or until muffins spring back upon touch. You can toothpick test, if you wish. Allow them to cool before frosting.


Directions for the frosting and piping:

In a medium bowl, beat softened cream cheese with shortening and powdered sugar until fluffy. Add extract, lemon juice, zest, and coloring. Continue to add more sugar if you want a stiffer consistency. Reserve some icing off to the side for decorations like flowers, shells, etc (if desired).


Scrape around the sides with a rubber spatula to ensure all color is evenly distributed. Fill a piping bag (connected to a large piping tip) with frosting. As I mentioned in my first cupcake post it's best to use a big tip for bigger cupcakes. Looks prettier, and less work. Make sure you have a lot of icing to work with.


Begin with an outer ring, and work your way with an inner spiral, 'til you cover the top of the cupcake. Repeat for all.


So, you can stop here--but I didn't. Drop flowers and leaves and dragees--oh my!
This step kinda requires specific piping tips, and most of the "basic" tips can be purchased at walmart or michael's--either individually, or in a "starter" kit. Really up to you if you want to invest in this kind of stuff. Anyway, I used a drop flower and leaf tip. Colored the frosting a purple and a green, filled separate bags with each tip, and went at it.


First the purple flowers, followed by the leaves.


As final touch, I used silver dragees for the flower "centers." Figured I could put my holiday snowflake cookie leftovers to good use. =) Yes, that is a tweezer I used for placement. There's really just no other way...


Ended them with some finishing touches...just some more leaves around the flowers.


Boxed them up, and they were ready to go. Happy Birthday Veeh = )


So overall, they were good. I liked my frosting a lot more than the cupcake itself--a bit too dense. I think in the future, I'll try 2 egg whites folded in, to the one egg I used. Otherwise, was a fun project for a birthday gift.